Help article
Browse all
Close

🛠 Editing my bucket
Learn how to edit bucket and its essentials.
A rep's journey starts with a good onboarding journey. Uhubs specialises in automating the whole process saving you time needed to quickly ramp them up.
The bucket editor is the element for creating onboarding journeys for different roles within your team. Instead of creating several tabs under excel for a rep's onboarding process, buckets allows you to organise specific content and development plans.
The description box allows you to edit what content your bucket will provide.
In this article, you will learn:
- How to edit text in the description
- How to edit your tasks
- Assigning team members and tags
- Other features
How to edit text in the description
You can edit the description by clicking on the box and typing. Formats are provided on the top:
- Headings (H1-H4)
- Bold text
- Italic text
- Underline
- Links
- Numbered lists
- Bullet points
- Remove all formats

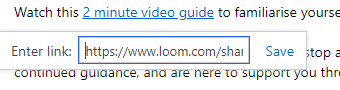
How to add links
Text can be highlighted and formatted, when choosing to link a text it prompts a field to enter the URL.
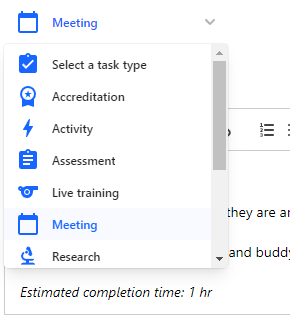
How to edit your tasks
Similarly on how to edit the description, the same method applies when editing your tasks. Here you have the ability to set types for your tasks - to uniquely distinguish tasks within others and provide a high level information of what reps should do.
Task menu
The menu on the top right allows you to move tasks up or down and delete them. Moving tasks allows you to organise your tasks or change their priority. Delete removes tasks within the bucket and cannot be undone.
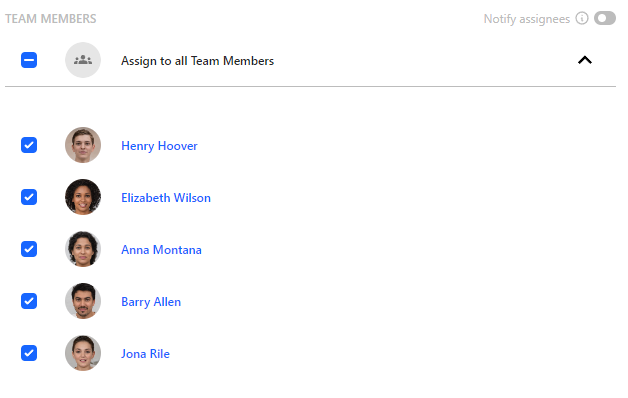
Assigning team members and tags
After adding tasks and content in, you can then assign the buckets to individuals or all - here you can create journeys within your team and only assign buckets to specific roles. Simply click on the drop down menu and click which reps you want to assign.
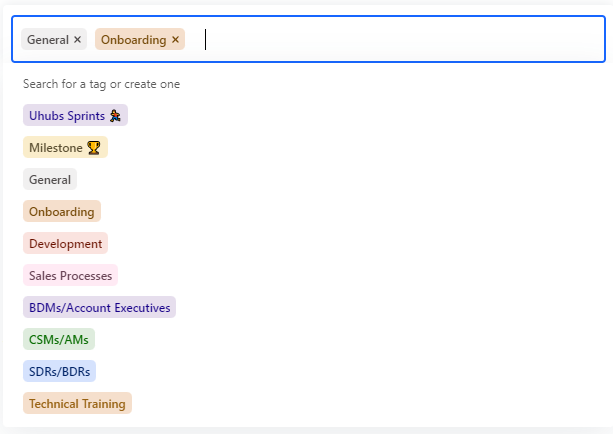
Tags
Tags allows you to make buckets unique and assign specific content within them. Choose from the default tags or create your own.
Other features
The editor contains toggles and a menu. The 'status toggle' sets your bucket to 'Active' or 'Draft'. Setting a bucket to 'Active' and assigning 1 or more reps on that bucket will mark the bucket live and can be seen within the rep's develop dashboard. The 'Notify assignees' toggle when turned on sends an email to reps whenever they are assigned to the bucket. Adding other members when the bucket is already assigned to reps will not notify the previous reps.
The menu allows you to duplicate or delete a bucket.

Duplicate allows to create a copy of the existing bucket with the copied bucket set to 'Draft' and all previously assigned team members. This saves you time when trying to create buckets with the same team members or similar content. Delete removes the bucket from your develop dashboard. This action cannot be undone.
Open questions?
Feel free to share any doubts, questions or feedback directly with our customer success team. We’re here to help ❤️
Contact us
.svg)